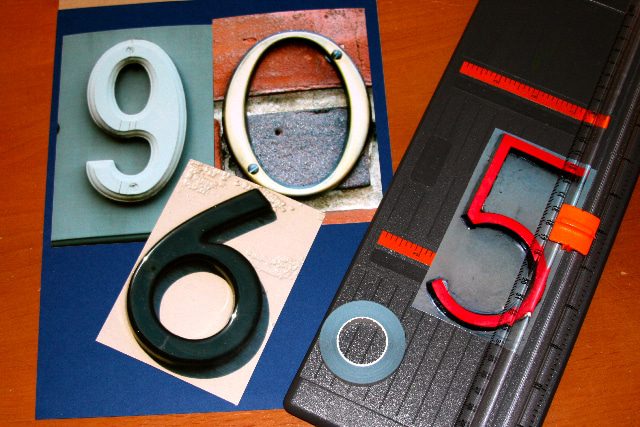
One way to add a bit of uniqueness to your big day is through your reception table numbers—weddings need these! These were made by going around town and taking photographs of various numbers. Yes, you could purchase ready-made ones, but these are wedding table number alternatives that we totally love! Here’s how to make them.
Historic, Modern Wedding Table Numbers
I saw this concept among other wedding table numbers ideas on Martha Stewart Weddings website. So, I thought it would be fun to personalize this DIY post the best way we know how. By going on a tour of the Hill City itself.
After perusing the downtown area and the historic districts (with my 9-year-old son, who was a great help in finding the numbers!), I came up with the numbers 0-9 that can be used to make unique table numbers for your wedding reception.
This is a fun way to incorporate your hometown or places that you and your fiance frequent. Take photos of the numbers from your favorite restaurant, where you met, the proposal location, or places you lived when you were growing up.
The possibilities are endless, but the end result is the same. It’s an adorably different way to mark your reception tables!
Table Numbers Wedding DIY Instructions
This full set of photos is available on Flickr, so feel free to view the table numbers here. The photos on Flickr are labeled as to what streets the numbers came from. Feel free to download them!
You will see that I tried to incorporate some of the most important streets in town. Enjoy this fun DIY post on rustic wedding table numbers.
You will need to take photos first—date night, anyone?—and have them printed. If you want double-sided numbers (as in a number on each side of the card), be SURE to print out two of each number.
Try to estimate the size table numbers cards you desire. I printed these out to be a 4×6 size, yet I did some trimming after they were printed.
Supplies for Modern Wedding Table Numbers
- your printed photographs
- thick scrapbooking paper
- paper trimmer
- double-sided tape (scrapbooking tape works well for this)
Instructions Table Numbers Wedding DIY
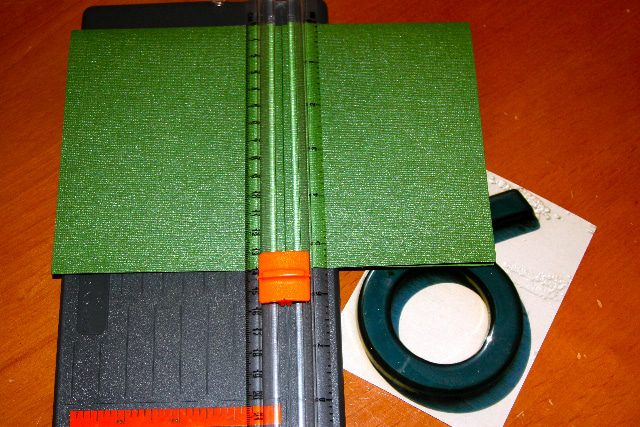
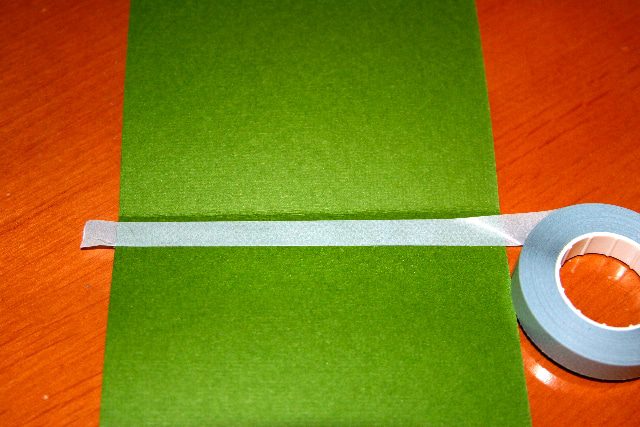
Begin by folding your paper in half. I purchased 8.5″ x 11″ paper and folded it into an 8.5″ x 5.5″ card. Then place your photo on top of it to see how much of the paper you will use as a trim.
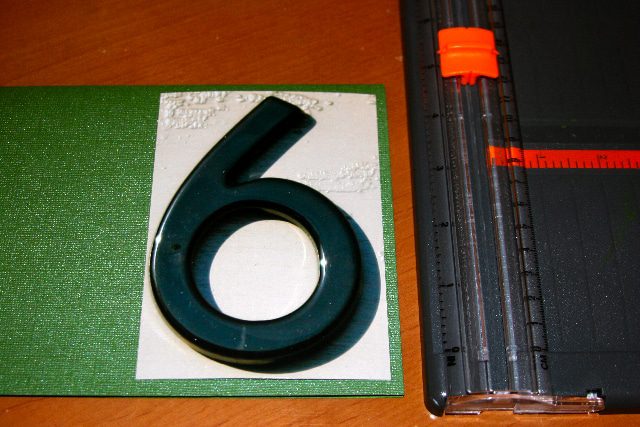
You can cut your photograph if necessary. I did trim! Here there is about .5″ of the green paper trim around the edges. This will help you determine where to make your cut on the paper.
Proceed to cut your paper. My blade was very sharp, so I decided to cut the paper while it was still in half. You may need to open the paper and cut it as a single sheet if your blade is dull.
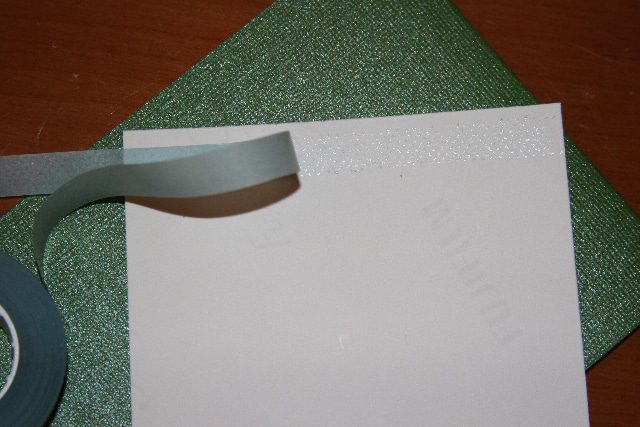
Take your double-sided tape, and use it to adhere the number to the cardstock paper. Turn the paper over and repeat if you are making a double-sided card with a number on each side.
Once you affix the number to the front of the cardstock, you can run a thin line of tape along the inside edge of the fold. This is so the card will stay folded once it is put into place.
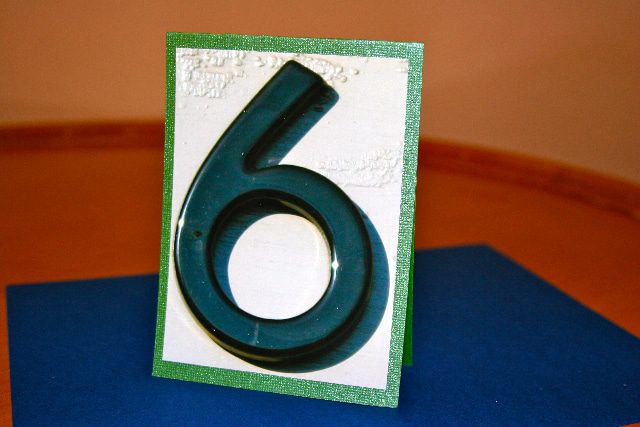
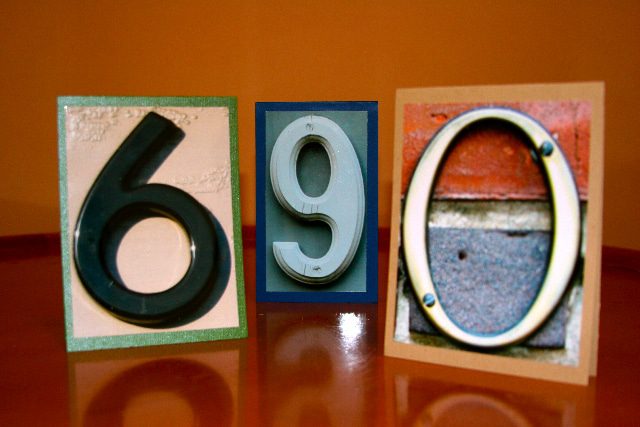
Stand your table numbers cards up and admire how adorable this will look on your reception table! I love how the “6” seems so 3-d due to the shadows and the time of day I took the photograph. This “6” was from a building on Rivermont Avenue in Lynchburg. It has a very Art Deco feel to it.
Here is a sampling of the finished table numbers. Remember, they all do not have to be uniform in size and shape because they will be on different tables. The “9” here is slightly skinnier due to the styling of the number.
Wedding Table Number Alternatives
That is a darling project, isn’t it? I know a lot of you scrapbooking and crafty types can take this DIY a bit further by adding embellishments and fun flairs of your own.
An alternative could be to place each number in a frame instead of adhering them to cardstock. Martha Stewart Weddings suggested using a mat board (used in framing), which would offer a heavier weight for outdoor weddings.
If your table numbers enter double digits, just put two of our numbers together. Or have fun hunting for combinations such as “10” and “17” on your own. Trust me, this is a challenge!
Hopefully, I have inspired you to add a hometown flair to your Lynchburg weddings, and I am looking forward to sharing more hometown DIYs with you in the future.
For more DIY projects, check here!
